Contouring and Highlighting for Your Face Shape: A 2026 Step-by-Step Guide
Anúncios
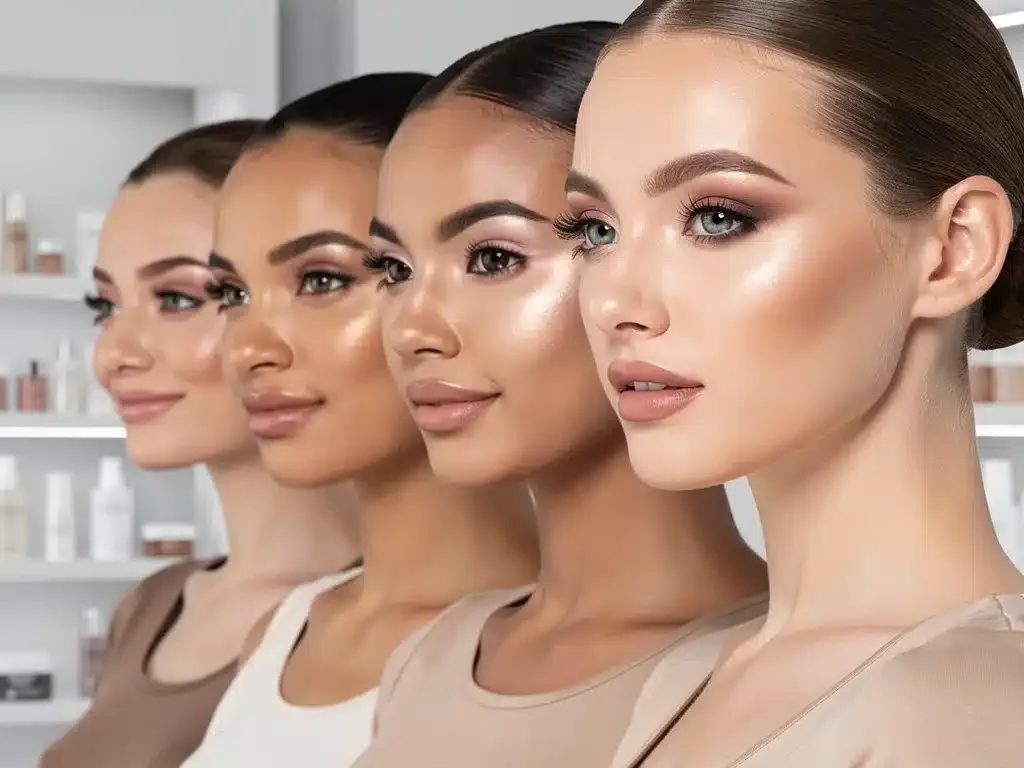
Unlocking a flawless, red-carpet-worthy glow starts with understanding your unique Face Shape rather than following generic makeup trends. Mastering the art of shadow and light requires a personalized approach that works with your natural bone structure instead of against it.
With 2026 bringing ultra-blendable cream formulations and precision sculpting tools, customizing your placement has never been easier.
Strategic cheekbone definition and targeted brightening can instantly elevate your features, creating seamless balance and dimension for any facial contour.
Whether you want to soften a strong jawline, elongate a round silhouette, or lift your cheekbones, targeted application is everything. Here is your definitive step-by-step guide to mastering customized shading and illumination for a naturally radiant look.
Understanding Your Face Shape
Identifying your face shape is the critical first step in effective Contouring and Highlighting for Your Face Shape.
Anúncios
This foundational knowledge allows for targeted application, enhancing your natural bone structure rather than creating an artificial appearance. Incorrect identification can lead to less flattering results, making precision paramount.
There are generally five main face shapes: oval, round, square, heart, and long. Each shape possesses distinct characteristics that dictate where contour and highlight should be applied to achieve balance and definition.
Taking the time to accurately assess your face will significantly improve your makeup outcome.
To determine your face shape, observe your jawline, forehead width, and the widest part of your face. Stand in front of a mirror with your hair pulled back and trace your reflection with a washable marker or lipstick to get a clear outline. This visual aid simplifies the identification process.
The Oval Face Shape
An oval face is characterized by balanced proportions, with the forehead slightly wider than the chin and a gently rounded jawline.
This shape is often considered ideal, as it provides a versatile canvas for various makeup looks. The goal for contouring and highlighting an oval face is to maintain its natural symmetry.
For oval faces, contouring should be subtle, focusing on adding a touch of definition rather than reshaping.
Anúncios
Apply contour lightly below the cheekbones, extending towards the temples, and a hint along the hairline. Highlighting should focus on the high points of the face to bring them forward gently.
Strategically, highlight the center of the forehead, the bridge of the nose, the tops of the cheekbones, and the cupid’s bow. This approach enhances the existing balance without over-sculpting. The objective is to create a soft, luminous finish that complements the face’s natural contours.
The Round Face Shape
Round faces are characterized by soft curves, with the width and length appearing almost equal, and a full chin.
The primary objective when applying Contouring and Highlighting for Your Face Shape for a round face is to create the illusion of more definition and length. This helps to break up the circularity and add angles.
Contouring for a round face should focus on narrowing the face and creating angles. Apply contour along the temples, under the cheekbones from the ears towards the corners of the mouth, and along the jawline. This technique helps to sculpt the face, providing a more elongated appearance.
Highlighting should be concentrated on the center of the forehead, the bridge of the nose, the highest point of the cheekbones, and the chin.
These highlighted areas draw attention to the center of the face, further contributing to the illusion of length and definition. The combination of deep contours and bright highlights creates a more structured look.
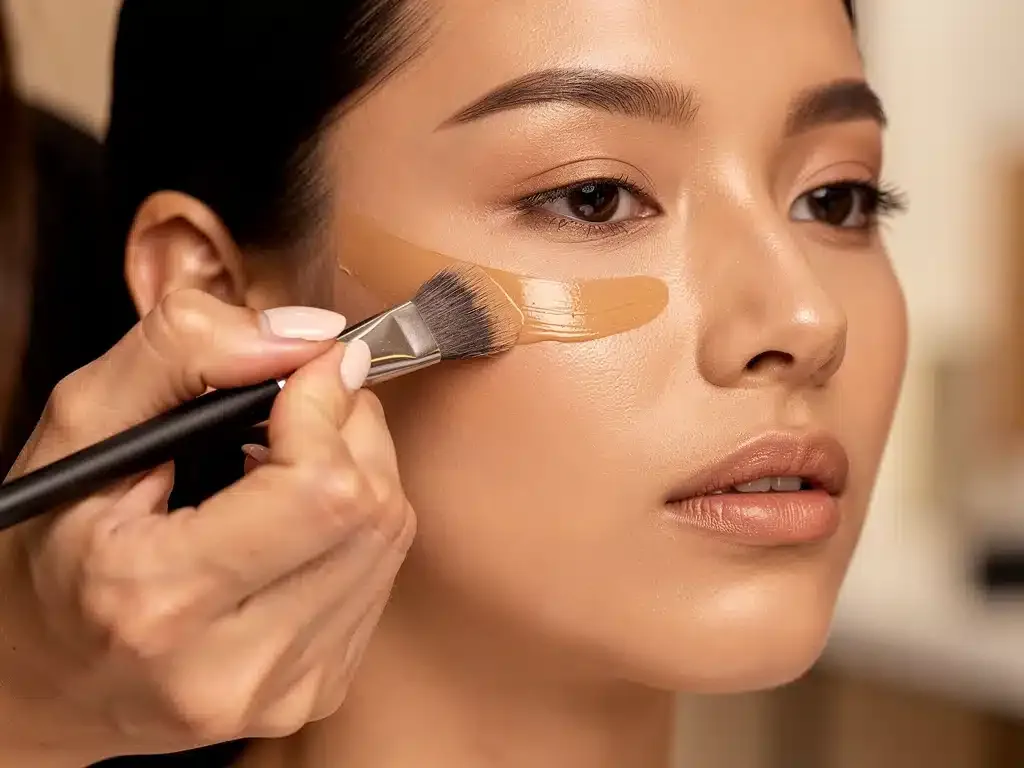
Choosing the Right Products for 2026
The year 2026 brings an array of innovative products designed for precise Contouring and Highlighting for Your Face Shape.
Selecting the correct formulas and shades is paramount to achieving a seamless, natural-looking finish. The choice between cream, liquid, and powder products depends on your skin type and desired intensity.
Cream and liquid contours offer a more natural, blendable finish, ideal for dry or mature skin, and for those seeking a dewy look.
Powder contours provide a more matte finish and are excellent for oily skin types or for setting cream products. Highlighters also come in similar formulations, each offering distinct effects.
When choosing shades, select contour products that are two to three shades darker than your natural skin tone, with a cool undertone to mimic shadows.
Highlighters should be one to two shades lighter than your skin, with a subtle shimmer that complements your skin’s undertone. Avoid overly warm or shimmery contour shades, as they can look unnatural.
Cream vs. Powder Formulations
Cream contour and highlight products are gaining significant traction in 2026 due to their blendability and skin-like finish.
They are applied directly onto the skin before setting with powder, allowing for more control and a softer look. Cream products are particularly beneficial for creating a hydrated, glowing complexion.
Powder formulations remain a staple for many, offering ease of application and excellent staying power, especially in humid climates.
They are best applied over foundation and can be layered for increased intensity. Many artists combine cream and powder products for enhanced longevity and dimension, a technique becoming increasingly popular for Contouring and Highlighting for Your Face Shape.
When utilizing both, apply cream products first, blend thoroughly, and then set with a light dusting of powder contour and highlight.
This layering technique ensures maximum impact and durability. The key is to blend each layer meticulously to avoid harsh lines or a cakey appearance.
Essential Tools and Application Techniques
Having the right tools is as crucial as selecting the correct products for effective Contouring and Highlighting for Your Face Shape.
High-quality brushes and sponges ensure seamless blending and precise application, which are vital for a professional-looking finish. Investing in appropriate tools elevates your makeup game significantly.
For contouring, dense, angled brushes are ideal for precise placement under the cheekbones and along the jawline. Softer, fluffy brushes work best for blending out harsh lines, ensuring a natural transition.
Beauty sponges, when damp, are excellent for blending both cream and liquid products into the skin, providing an airbrushed effect.
Highlighting often benefits from smaller, tapered brushes for pinpoint application on the high points of the face, such as the brow bone and cupid’s bow.
Fan brushes are also popular for a diffused glow on the cheekbones. The rule of thumb is to use tools that allow for controlled application and effortless blending.
Mastering the Blend
Blending is arguably the most critical step in successful contouring and highlighting. Poor blending results in visible lines and an unnatural appearance, detracting from the desired sculpted effect. Dedicate sufficient time to this stage, ensuring all products melt seamlessly into your skin.
Use gentle, circular motions or dabbing techniques with your chosen brush or sponge. Start with a small amount of product and build it up gradually, blending as you go.
This prevents over-application and makes it easier to correct any mistakes, crucial for achieving a refined Contouring and Highlighting for Your Face Shape.
Remember to blend upwards for contour under the cheekbones to lift the face, and outwards for highlight to diffuse the glow.
The goal is to create a soft transition between the contoured and highlighted areas and your natural skin tone. A flawless blend makes your sculpted features appear inherent rather than applied.
Contouring Techniques for Specific Face Shapes
Tailoring your contouring technique to your unique face shape is essential for achieving optimal results in Contouring and Highlighting for Your Face Shape.
Generic application methods often fall short, as they do not account for the diverse bone structures found across individuals. Personalized strategies yield the most flattering outcomes.
For a square face, the aim is to soften sharp angles and create a more oval appearance. Apply contour along the sides of the forehead and along the jawline to minimize their prominent features.
A gentle application under the cheekbones helps to create a subtle lift and definition, harmonizing the facial structure.
Heart-shaped faces, characterized by a wider forehead and a narrower chin, benefit from contouring the temples and the sides of the forehead to reduce width.
A slight contour under the cheekbones and a touch on the tip of the chin can help balance the proportions. This approach ensures a more balanced and softer facial outline.
Long Face Contouring
Long faces benefit from techniques that aim to reduce perceived length and add width. The primary focus for Contouring and Highlighting for Your Face Shape on a long face is to create horizontal lines that visually shorten the face.
This is achieved by strategically placing contour on the top of the forehead and under the chin.
Apply contour along the hairline and directly under the chin to visually shorten the face. Also, extend contour horizontally under the cheekbones, rather than diagonally, to create the illusion of width.
This technique helps to break up the vertical length and create a more balanced appearance, complementing the face’s natural lines.
Avoid highlighting the center of the forehead or the bridge of the nose, as this can further elongate the face. Instead, focus on highlighting the tops of the cheekbones and under the eyes to draw attention outwards. This careful application ensures that the overall effect is harmonized and flattering.
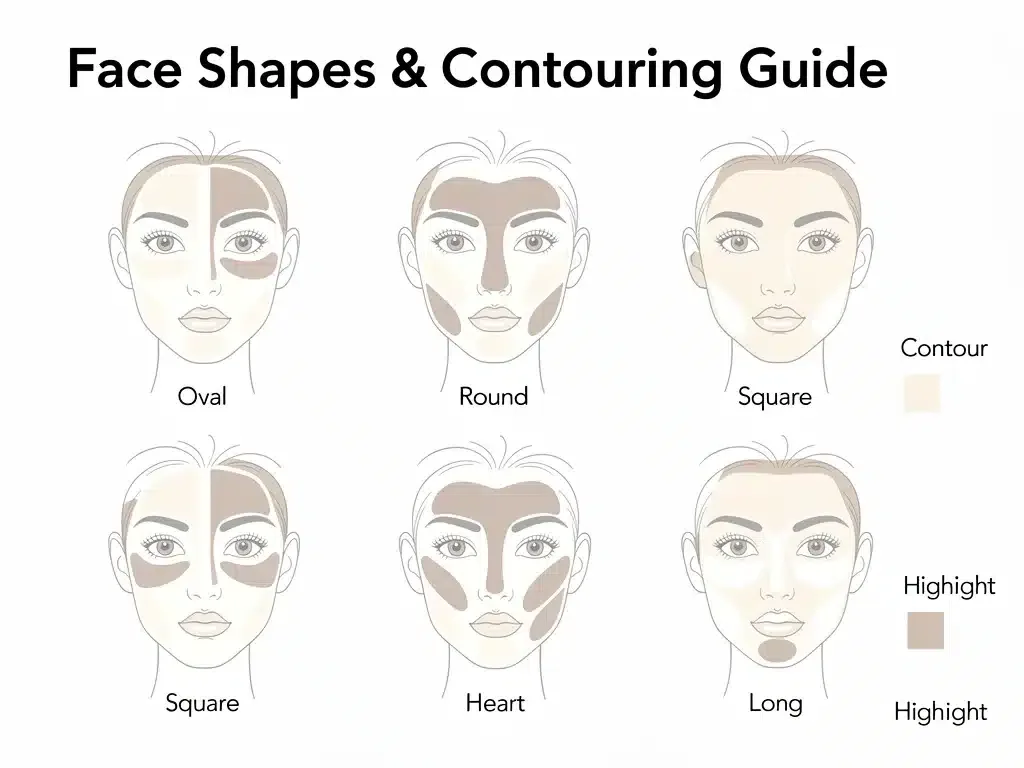
Highlighting Techniques for Specific Face Shapes
Highlighting plays a crucial role in bringing forward features and adding a radiant glow, especially when combined with Contouring and Highlighting for Your Face Shape.
Just like contouring, highlighting should be customized to your face shape to enhance your best features. It draws light to specific areas, creating dimension and luminosity.
For a square face, highlight the center of the forehead, the bridge of the nose, and the chin to soften angular features and draw attention to the center.
This helps to create a more rounded appearance, balancing the strong jawline and forehead. Highlighting the high points of the cheekbones will also add a touch of softness.
Heart-shaped faces should focus on highlighting the center of the forehead, the bridge of the nose, the tops of the cheekbones, and the cupid’s bow.
This approach brings balance to the wider forehead and narrower chin, creating a more harmonious overall look. Avoid highlighting the chin too intensely, as this can accentuate its narrowness.
Universal Highlighting Tips
Regardless of your face shape, there are universal rules for highlighting that ensure a flattering finish.
Always apply highlighter to the highest points of your face where light naturally hits. This includes the tops of your cheekbones, the brow bone, the inner corners of your eyes, and the cupid’s bow.
Use a light hand when applying highlighter; a little goes a long way. The goal is to create a subtle, ethereal glow, not a stark stripe of shimmer.
Blend the highlighter seamlessly into your skin and other makeup for a natural, luminous effect that complements your Contouring and Highlighting for Your Face Shape.
Consider the type of highlighter based on your desired finish. Liquid and cream highlighters provide a dewy, natural glow, while powder highlighters offer more intensity and can be built up.
For 2026, many prefer a multi-dimensional glow, combining different textures for a radiant, sculpted look.
Common Mistakes and How to Avoid Them
Even with the best products and tools, common mistakes can undermine your Contouring and Highlighting for Your Face Shape efforts.
Awareness of these pitfalls is the first step towards avoiding them and achieving a polished, professional look. Precision and patience are key in this intricate makeup art.
One frequent error is using the wrong shade of contour. A contour shade that is too warm or too dark can look muddy and unnatural, resembling dirt rather than a shadow. Always opt for cool-toned shades that are only a few shades deeper than your skin tone to create realistic shadows.
Another common mistake is poor blending. Harsh lines from unblended contour or highlight are a dead giveaway of applied makeup, rather than enhanced features.
Dedicate ample time to blending, using appropriate tools, and ensure there are no visible edges where products start or end.
Over-Application and Product Placement
Over-application of both contour and highlight can lead to an unnatural, heavy look. The goal of Contouring and Highlighting for Your Face Shape is to enhance, not to mask.
Start with a minimal amount of product and build up intensity gradually, allowing you to control the depth and luminosity.
Incorrect product placement, especially for contour, can alter your face shape in unintended ways. Applying contour too low on the cheekbones, for instance, can drag the face down instead of lifting it.
Always refer to your specific face shape guide to ensure precise and effective placement, maximizing the desired sculpting effect.
Finally, neglecting to set your cream or liquid products can lead to smudging and reduced longevity. While not always necessary for a natural look, a light dusting of translucent powder can lock everything in place, especially in warmer climates or for extended wear. This simple step ensures your sculpted look lasts throughout the day.
| Key Point | Brief Description |
|---|---|
| Face Shape Identification | Crucial first step for personalized contouring and highlighting. |
| Product Selection | Choose cool-toned contours and complementary highlighters for natural results. |
| Blending Importance | Seamless blending is vital to avoid harsh lines and achieve a natural finish. |
| Targeted Application | Apply based on specific face shape to enhance features and create balance. |
Frequently Asked Questions About Contouring and Highlighting
What is the most important step in contouring and highlighting?▼The most important step is accurately identifying your face shape. This dictates where to apply contour and highlight to enhance your natural features effectively. Without this, even the best products and techniques may not yield optimal results, making personalization key.
How do I choose the right contour shade for my skin tone?▼Select a contour shade that is two to three shades darker than your natural skin tone and has a cool, ash undertone. This mimics natural shadows on the face. Avoid warm or orange-toned shades, as they can look unnatural and muddy, detracting from the desired sculpted effect.
Can I use both cream and powder products for contouring and highlighting?▼Yes, combining cream and powder products is a popular and effective technique. Apply cream products first, blend them thoroughly, and then set with a light layer of powder. This layering enhances longevity and intensity, providing a more defined and durable sculpted look for your Contouring and Highlighting for Your Face Shape.
What tools are essential for precise application?▼Essential tools include dense, angled brushes for contouring, softer fluffy brushes for blending, and small tapered brushes or fan brushes for highlighting. Damp beauty sponges are also excellent for blending cream and liquid products, ensuring a seamless, airbrushed finish across the face.
How do I avoid a harsh or unnatural look when contouring?▼To avoid a harsh look, always blend meticulously. Use a light hand, starting with a small amount of product and building up gradually. Ensure there are no visible lines and that all products melt seamlessly into your skin. Proper shade selection and placement are also crucial for a natural finish with your Contouring and Highlighting for Your Face Shape.
Perspectives and Future Trends
The landscape of Contouring and Highlighting for Your Face Shape continues to evolve, with personalization and innovative product formulations driving future trends.
Expect to see further advancements in AI-powered tools that help individuals identify their face shape and suggest tailored application techniques, making expert-level makeup accessible to everyone.
The emphasis will remain on achieving a natural, sculpted look that enhances individual beauty rather than masking it.
As the beauty industry progresses, sustainability in product development and ethical sourcing will also play a more significant role, influencing consumer choices and brand offerings.