Smoky Eye Secrets: Create a Sultry Look with These Easy Steps

Anúncios
Mastering the art of a smoky eye involves a blend of specific techniques and product selection, allowing individuals to craft a deep, alluring gaze that enhances facial features for various occasions with practiced ease.
The allure of a perfect smoky eye is undeniable, a timeless makeup look that exudes sophistication, mystery, and a touch of dramatic charm. Whether you’re aiming for a subtle daytime smolder or a full-on evening glam, understanding the nuances of creating this iconic look is key. This guide will reveal the essential Smoky Eye Secrets: Create a Sultry Look with These Easy Steps, empowering you to achieve a flawless, captivating gaze with confidence and ease.
Anúncios
The foundational elements of a captivating smoky eye
Achieving a truly captivating smoky eye begins long before the first swipe of eyeshadow. It requires a meticulous approach to fundamental elements, from preparing the canvas of your eyelids to selecting the correct tools. Ignoring these preliminary steps can compromise the longevity and impact of your final look, underscoring their importance in the overall process. A well-prepared base ensures the colors adhere smoothly and blend seamlessly, preventing creasing and fading throughout the day or night.
Understanding the anatomy of your eye shape is also pivotal. While the smoky eye is universally flattering, subtle adjustments might be necessary to enhance different eye types, such as hooded, almond, or monolid eyes. This adaptability ensures that the smoky effect complements your unique features, rather than overpowering them. The goal is to create depth and dimension, drawing attention to the eyes in a way that feels natural and striking. Precision in application, even in the initial stages, sets the tone for the entire look, transforming a simple makeup application into an art form.
Prepping your eyelids for perfection
A smooth, even base is the cornerstone of any successful eye makeup, especially a smoky eye where blending is paramount. Preparing your eyelids correctly ensures that eyeshadows appear more vibrant and last longer, resisting the tendency to crease or fade. This crucial step also creates a uniform surface, allowing for seamless transitions between colors. Neglecting proper preparation can lead to a patchy application and a less polished finish.
Anúncios
- Cleanse: Gently wash your eyelids to remove any oils or leftover makeup. A clean base is essential for product adherence.
- Moisturize lightly: Apply a small amount of non-greasy eye cream. Allow it to fully absorb to avoid product slippage.
- Prime: Use an eyeshadow primer specifically designed to create a sticky base and enhance color payoff. This is a non-negotiable step for longevity.
- Conceal (optional): If you have visible veins or discoloration, a thin layer of concealer can help even out the skin tone, providing a brighter canvas. Set with a translucent powder sparingly.
Essential tools for seamless blending
Just as a painter needs the right brushes, a makeup artist relies on a carefully selected array of tools to execute a flawless smoky eye. The quality and type of brushes significantly impact the blend and diffusion of color, which are critical for achieving that signature smoky effect. Investing in a few key brushes can elevate your application from amateur to professional, making the process much easier and the results far more impressive. Each brush serves a unique purpose, contributing to the overall harmony of the look.
Proper cleaning and maintenance of your brushes also play a vital role. Dirty brushes can harbor bacteria and transfer old makeup, compromising the hygiene and quality of your application. Regular cleaning ensures that your tools remain soft, effective, and ready for use, preserving their integrity and extending their lifespan. Consider a dedicated brush cleaning solution or a gentle baby shampoo for optimal results. Remember, a well-cared-for tool performs at its best, ensuring beautifully blended smoky eyes every time.
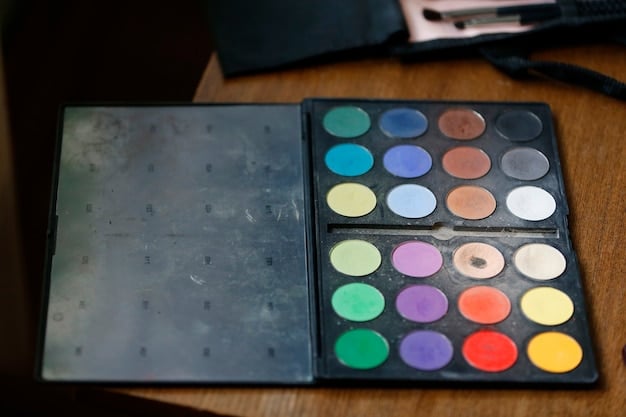
Choosing the perfect palette and textures
The success of your smoky eye largely hinges on the careful selection of your color palette and the textures of the products you use. While the classic smoky eye features dark, intense shades, the modern interpretation offers a vast spectrum of possibilities, from deep jewel tones to sophisticated neutrals. Understanding how different textures interact is crucial for achieving a seamless, multi-dimensional look that exudes effortless glamor. The right combination can elevate your style, making your eyes the focal point of your entire ensemble.
Consider the occasion and your personal style when choosing your colors. A subtle bronze smoky eye might be perfect for daytime, while a rich plum or emerald green could add a captivating twist for an evening event. The interplay of matte, satin, and shimmer textures creates depth and light, preventing the look from appearing flat. Each texture serves a distinct purpose; mattes provide definition, satins add a soft sheen, and shimmers introduce a captivating sparkle. Experimentation is encouraged to discover combinations that resonate with your individual aesthetic.
Beyond black: exploring color variations
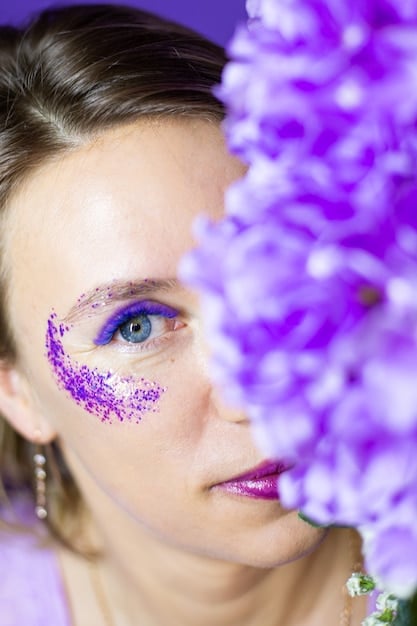
While the traditional smoky eye is synonymous with black and dark grey, limiting yourself to these shades means missing out on a world of creative possibilities. Expanding your color choices can add a unique twist to this classic look, allowing for personalized expressions that complement various outfits, moods, and events. Exploring different hues not only breathes new life into the smoky eye but also makes it more versatile and adaptable to diverse complexions and preferences. The modern smoky eye thrives on thoughtful color incorporation, moving beyond rigid boundaries.
Browns offer a softer, more approachable smoky effect, ideal for daytime wear or for those with lighter features. Deep greens, blues, and purples can create a stunning, vibrant smoky eye that truly pops, especially when paired with complementary eye colors. Even rose golds and warm coppers can be blended for a sultrier, more romantic take on the look. The key is to maintain the smoky gradient—a darker outer corner fading into lighter shades towards the inner corner—regardless of the colors chosen. This ensures the characteristic depth and allure remain intact.
The role of texture: matte, satin, and shimmer
The interplay of different textures is a critical, yet often overlooked, aspect of creating a truly dynamic and professional-looking smoky eye. Leveraging matte, satin, and shimmer finishes strategically can add complex dimensions, preventing your eye makeup from appearing flat or one-dimensional. Each texture serves a unique purpose in building depth, light, and intensity, contributing to the overall allure of the look. Understanding their individual strengths allows for a more nuanced application, transforming a simple blend into a work of art.
- Matte eyeshadows: These are essential for creating depth and structure, particularly in the crease and outer corner. They provide a pure, rich color without any reflective properties, making them ideal for sculpting and defining the eye shape.
- Satin eyeshadows: Offering a subtle sheen, satin textures are perfect for the lid, providing a soft glow that catches the light without being overtly sparkly. They blend beautifully and can add a sophisticated finish.
- Shimmer eyeshadows: Best used sparingly on the center of the lid or inner corner, shimmer shades add a pop of light and glamour. They reflect light intensely, drawing attention and adding a celebratory touch.
- Cream eyeshadows: These can serve as an excellent base for powder shadows, intensifying color and increasing longevity. They provide an even canvas and their emollient nature allows for smooth blending before setting.
Step-by-step: building your smoky masterpiece
Creating a smoky eye, while appearing complex, is a methodical process that becomes intuitive with practice. Breaking it down into manageable steps simplifies the application, ensuring a smooth transition between colors and a perfectly blended finish. Patience and precision are your best allies in this endeavor, allowing each layer to build upon the last for maximum impact. The journey from a bare lid to a sultry gaze is a rewarding one, unveiling the power of strategic makeup application.
Remember that the goal is a gradual diffusion of color, not harsh lines. The beauty of a smoky eye lies in its seamless transitions, where shades melt into one another as if by magic. Don’t be afraid to adjust and refine as you go; makeup is art, and every stroke contributes to the masterpiece. The order of application is designed to optimize blending and minimize fallout, ensuring a clean and polished result. Building the intensity slowly prevents over-application, which can be harder to correct. This systematic approach guarantees a polished and professional look every time.
Applying the deepest shade for definition
The deepest shade is the anchor of your smoky eye, providing the intense definition and depth that are characteristic of the look. It’s typically applied first to the lash line and outer corner, serving as the foundation upon which lighter shades will be layered and blended. This initial application sets the darkest point of your gradient, guiding the subsequent steps. Choosing a highly pigmented, blendable formula for this shade is crucial to ensure a rich, true color payoff.
Begin by using a small, dense brush or a pencil brush to press the darkest shadow along your upper lash line, extending it slightly past the outer corner. Then, carefully extend this color into the outer V of your eyelid, creating a soft, curved shape that follows the natural curve of your eye. The key is to build intensity gradually; start with a small amount of product and add more if needed, rather than applying too much at once. This precision ensures a controlled application that can be easily blended out later, preventing harsh lines and maintaining a clean edge.
Blending out to create the smoky gradient
Blending is the undisputed heart of the smoky eye, transforming distinct lines of color into a seamless, captivating gradient. It’s the step that elevates the look from merely applying eyeshadow to truly creating that diffused, mysterious allure. Proper blending requires patience and the right tools, ensuring that each shade transitions fluidly into the next without visible demarcation lines. This meticulous process is what gives the smoky eye its signature soft-focus effect, making your eyes appear larger and more enchanting. It’s an art form that, once mastered, opens up a world of eye makeup possibilities.
Once your deepest shade is applied, take a clean, fluffy blending brush and gently sweep it over the edges of the dark shadow. Use small, circular motions and windshield wiper movements to diffuse the color upwards and outwards. Next, apply your medium transition shade slightly above the dark color, blending the two together where they meet. This softens the edges and creates a smooth transition. Continue this process with your lighter highlight shade, blending it into the medium shade towards your brow bone. The goal is to eliminate any harsh lines, achieving a harmonious blend that looks effortless. Remember to clean your blending brush often to avoid muddying colors.
Finishing touches: mascara, liner, and brows
While eyeshadow forms the core of the smoky eye, the finishing touches of mascara, eyeliner, and impeccably groomed brows are what truly complete the look, bringing it to life with precision and polish. These elements aren’t mere afterthoughts; they are integral components that define the intensity, frame the eyes, and provide the ultimate finessing details. Neglecting them can leave your smoky eye looking unfinished, undermining the effort put into blending and color selection. Each element contributes distinctively to the overall sophistication and allure.
Mascara adds volume and length, enhancing the dramatic effect of the smoky shadow. Eyeliner further defines the eye shape, adding precision and intensity right at the lash line. And brows, often called the “frame of the face,” provide structure and balance, ensuring that the smoky eye doesn’t overpower your features. Together, these elements synergize to create a cohesive and impactful look that draws attention directly to your eyes. Their strategic application is the final step in ensuring your smoky masterpiece is complete and captivating.
Defining with eyeliner for added intensity
Eyeliner is the secret weapon for amplifying the intensity and definition of a smoky eye, providing a sharp contrast to the diffused eyeshadow. It serves to deepen the lash line, making lashes appear fuller and eyes more captivating. Whether you opt for a gel, pencil, or liquid liner, its precise application can transform the entire look, adding a layer of sophistication and drama. This step allows you to sculpt and refine the eye shape, making your gaze even more magnetic. The choice of liner type can subtly alter the final effect, allowing for customization.
- Kajal or kohl pencil: Ideal for smudging into the lash line for a softer, more integrated look. Perfect for creating a subtle, smoky effect even without eyeshadow, or for intensifying the base of your existing smoky eye.
- Gel liner: Offers a more intense, long-lasting line that can be smudged quickly before setting. Provides excellent control for precise lines or for building up a thicker, dark base.
- Liquid liner: Best for creating a crisp, sharp line above the lash line for added definition and a polished finish. While not traditionally “smoky,” a thin line can define the top lash line beautifully even with a diffused shadow.
- Smudging: After applying liner to the upper and lower lash lines, gently smudge it with a small brush or a cotton swab. This softens the line and blends it seamlessly with the eyeshadow, enhancing the smoky effect.
The importance of ample mascara and well-groomed brows
No smoky eye is complete without dramatic lashes and perfectly groomed brows, as these elements provide the crucial framework and final flourish for your intense eye makeup. Mascara enhances the depth and allure of your lashes, making them appear longer, thicker, and more voluminous, which is essential for balancing the heavy shadow. Brows, on the other hand, frame your entire face, directing attention to your eyes and providing the necessary structure to anchor the smoky effect. Together, they bring cohesion and polish to the entire look.
For lashes, multiple coats of a volumizing and lengthening mascara are typically ideal, focusing on the roots to create a dense lash line. You might also consider false eyelashes for an extra touch of glamour and drama, especially for evening events. For brows, fill in any sparse areas with a brow pencil, powder, or pomade that matches your natural hair color, then brush them into place with a spoolie. A clear brow gel can help set them for all-day hold. Defined brows provide a clean, lifted effect, creating a captivating contrast with the soft, smoky shadow.
Troubleshooting common smoky eye challenges
While the allure of the smoky eye is undeniable, executing it flawlessly can sometimes present a few challenges. From creasing to an overly intense application, encountering issues is a natural part of the learning process. Understanding how to troubleshoot these common pitfalls not only improves your technique but also builds your confidence, ensuring that your smoky eye achieves its desired sultry effect every time. Awareness of these problems and their solutions is key to mastering the look.
Many of these challenges stem from either product choice, application technique, or insufficient preparation. Addressing these root causes rather than just the symptoms ensures a more sustainable solution. The goal is to achieve a blended, long-lasting, and captivating look, free from common frustrations. With a few strategic adjustments, a challenging smoky eye can be transformed into a stunning one, demonstrating the power of informed makeup application.
Avoiding the “racoon eyes” look
The “racoon eyes” look, characterized by overly dark or poorly blended shadow that extends too far under the eyes, is a common pitfall when attempting a smoky eye. It can turn a sophisticated look into a messy one, disrupting the intended alluring effect. Avoiding this requires careful control over product placement and a nuanced approach to applying shadow to the lower lash line. Understanding the causes and implementing preventative measures is key to maintaining a clean and refined finish, ensuring your smoky eye remains elegant and chic.
- Use less product: When applying shadow to the lower lash line, always tap off excess product from your brush. Start with a very small amount and build up if needed.
- Softer shades below: Consider using a slightly lighter or less intense shade on the lower lash line than on the upper lid. A medium brown or grey can create a smoky effect without being too harsh.
- Blend, blend, blend: Use a small, precise brush to blend the lower lash line shadow into a soft, diffused line. Ensure it doesn’t extend too far down.
- Clean up: Keep a cotton swab with a tiny amount of micellar water or concealer handy to clean up any fallout or smudges immediately. This maintains crispness.
Fixing creasing and fallout
Creasing and fallout are two of the most frustrating challenges when creating any eye makeup look, especially a smoky eye, where dark pigments can be particularly unforgiving. Creasing occurs when eyeshadow settles into the fine lines of the eyelid, while fallout refers to the powdery particles that land on the cheeks during application. Both issues can compromise the pristine appearance of your smoky eye, making it look less polished and more unkempt. Addressing these problems requires a combination of preventative measures and quick fixes.
Prevention is always better than cure. Using a high-quality eye primer is paramount to extend wear and minimize creasing, as it creates a smooth, even base for shadows to adhere to. For fallout, applying eyeshadows before foundation allows for easy cleanup without disturbing your base makeup. Tapping off excess product from your brush before application also significantly reduces fallout. If fallout still occurs, a piece of tape gently pressed against the skin can lift the pigment without smudging, or a fluffy brush can gently sweep it away. For creasing, a quick pat with a clean fingertip can temporarily smooth it out, but proper priming offers the most effective long-term solution.
Advanced techniques and variations
Once you’ve mastered the basic smoky eye, a world of advanced techniques and variations opens up, allowing you to personalize the look and adapt it to various occasions and styles. Moving beyond the traditional black and grey, you can explore different color schemes, incorporate graphic elements, or play with unique textures to create truly bespoke looks. These advanced methods empower you to unleash your creativity, transforming the smoky eye from a classic go-to into a dynamic expression of your individual artistry. Experimentation is the key to discovering your signature spin on this beloved style.
These techniques often involve a deeper understanding of color theory, light reflection, and innovative application methods. Whether it’s a vibrant jewel-toned smoky eye, a cut-crease variation, or a reverse smoky approach, each adaptation offers a fresh perspective on the classic. Such variations make the smoky eye incredibly versatile, capable of complementing anything from a casual brunch to a red-carpet event. Embracing these advanced skills elevates your makeup proficiency, turning you into a true smoky eye connoisseur capable of captivating gazes and inspiring others.
The reverse smoky eye and beyond
The “reverse smoky eye” is an exciting twist on the classic, featuring the darkest and most intense part of the shadow concentrated on the lower lash line, rather than the upper lid. This unconventional approach creates a unique, edgier look that is both dramatic and surprisingly flattering, drawing attention downwards and outward. It’s a fantastic way to experiment with the traditional smoky eye while adding an element of surprise. This technique is particularly impactful for those looking to highlight the lower lash line or for hooded eyes, where upper lid shadow might be less visible when the eyes are open. It showcases how a small shift in application can drastically alter the final impression, proving that creativity in makeup knows no bounds.
Beyond the reverse smoky, other variations include the “colorful smoky eye,” where blues, greens, purples, or even red tones replace the traditional neutrals; the “soft smoky eye,” which uses lighter browns or greys for a more subtle daytime look; and the “glitter smoky eye,” which incorporates loose glitter or shimmery pigments over the base for added sparkle. There’s also the “halo smoky eye,” where a lighter, often metallic, shade is placed in the center of the lid, surrounded by darker shades, creating a spotlight effect. Each variation challenges conventional application while maintaining the core principles of blending and gradient. These advanced techniques invite continuous experimentation, ensuring your smoky eye remains fresh, exciting, and uniquely yours.
Integrating pops of color or glitter
For those seeking to inject extra flair into their smoky eye, integrating pops of color or glitter offers an exhilarating pathway to personalization and elevated drama. While the traditional smoky eye is often synonymous with muted, intense shades, a strategic splash of vibrant hue or glittering sparkle can transform the look from sophisticated to show-stopping. This artistic license allows for playful experimentation, adapting the classic to suit different moods, outfits, or occasions, ensuring your eyes are the true center of attention.
A pop of color can be introduced by using a bright eyeliner on the lower lash line, a vibrant shadow on the inner corner, or even as a transition shade in the crease. For instance, a classic black smoky eye paired with a surprising electric blue liner can create a striking contrast. Glitter, on the other hand, adds an unparalleled dimension of sparkle. It can be dabbed onto the center of the lid for a “spotlight” effect, applied over a cream shadow base for intense adhesion, or even used sparingly on the lower lash line for a subtle hint of glam. Remember to use a glitter adhesive or a tacky base to minimize fallout and maximize sparkle. These additions elevate the smoky eye from a mere makeup application to a statement of individual style and creativity, ensuring your gaze truly mesmerizes.
| Key Aspect | Brief Description |
|---|---|
| ✨ Prep & Prime | Crucial for smooth application and long-lasting wear. |
| 🎨 Color & Texture | Selecting the right shades and finishes for depth. |
| 🖌️ Blending Techniques | The essence of a smoky eye, ensuring seamless transitions. |
| 👁️ Finishing Touches | Mascara, liner, and brows for a complete, polished look. |
Frequently asked questions about smoky eyes
To prevent fallout, always tap off excess shadow from your brush before applying. You can also press the shadow onto your lid rather than sweeping, and consider doing eye makeup before foundation. Using a damp brush with metallic or shimmer shadows can also improve adherence, dramatically reducing powdery residue on your cheeks. A good eye primer also helps shadows cling better.
Absolutely, a brown smoky eye is a beautiful, softer alternative to the traditional black. It’s incredibly versatile for daytime wear or for those who prefer a less intense look. Use various shades of brown—from light beige to deep espresso—to create the signature gradient. This look is universally flattering and can be easily adapted to suit any occasion, offering a warm, inviting allure.
Longevity for your smoky eye begins with proper preparation. Always use an eyeshadow primer on your eyelids to create a grippy base and prevent creasing. Layering cream shadows under powder shadows can also enhance staying power. Finally, setting your finished eye makeup with a setting spray will lock everything in place, ensuring your smoky eye remains vibrant and smudge-proof for hours.
For a seamless smoky eye, invest in a dense packing brush to apply the initial dark shade, a fluffy blending brush for diffusing edges, and a smaller, more precise pencil brush for the lower lash line and outer corner detailing. A flat, synthetic brush can also be useful for applying shimmers. Quality brushes are key to achieving well-blended, professional-looking results every time.
Yes, the smoky eye is incredibly versatile and can be adapted for all eye shapes. For hooded eyes, focus the darker shades on the outer V and lower lash line. For monolid eyes, build depth by layering, extending the shadow slightly above the crease. Almond eyes can generally follow standard techniques. The key is to understand your eye’s unique characteristics and adjust placement and blending accordingly to enhance your features.
Conclusion
Mastering the smoky eye is an artful journey, one that transforms individual features with a stroke of elegance and a whisper of allure. From meticulous preparation to the final flourish of mascara, each step contributes to a captivating gaze that speaks volumes without a single word. While the classic smoky eye remains a timeless symbol of sophistication, the freedom to integrate pops of color, shimmer, or even experiment with reverse techniques ensures this look is as versatile as it is striking. With practice and an understanding of these essential secrets, you’re not just applying makeup; you’re crafting a personal statement, ready to mesmerize onlookers with every glance.


