Concealer Secrets: Banish Dark Circles & Blemishes for Perfect Skin
Anúncios
Mastering concealer application involves strategic shade selection, precise layering, and targeted techniques to effectively neutralize dark circles and camouflage blemishes, achieving a flawless and natural-looking complexion.
Unveiling the mystery behind a truly flawless complexion, this guide delves into the essential Concealer Secrets: How to Banish Dark Circles and Blemishes for a Perfect Complexion. Whether you’re battling persistent under-eye shadows or seeking to effortlessly erase imperfections, understanding the nuances of concealer can transform your makeup routine. Let’s explore the techniques and product knowledge that will empower you to achieve a radiant and even skin tone.
Anúncios
Understanding Concealer: Beyond Basic Coverage
Concealer is often seen as a magic wand for imperfections, but its true power lies in understanding its multifaceted nature. It’s not just about covering; it’s about correcting, brightening, and evening out the skin tone. The right concealer acts as a strategic tool, working in harmony with your foundation to create a seamless canvas.
Many makeup enthusiasts underestimate the variety of concealers available, each designed for specific purposes. Identifying your primary concerns, whether it’s hyperpigmentation, redness, or textural irregularities, is the first step toward selecting a product that truly performs. This initial assessment guides you toward the optimal formula and application method.
The Spectrum of Concealer Types
Concealers come in various forms, each offering distinct benefits. Understanding these formulations is crucial for achieving professional-level results:
Anúncios
- Liquid Concealer: Versatile and widely popular, liquid formulas offer buildable coverage, from sheer to full. They are excellent for everyday use and can be applied thinly for a natural finish or layered for more problematic areas.
- Cream Concealer: Often more pigmented than liquids, creams provide medium to full coverage, ideal for disguising stubborn dark circles or significant blemishes. Their thicker consistency requires careful blending.
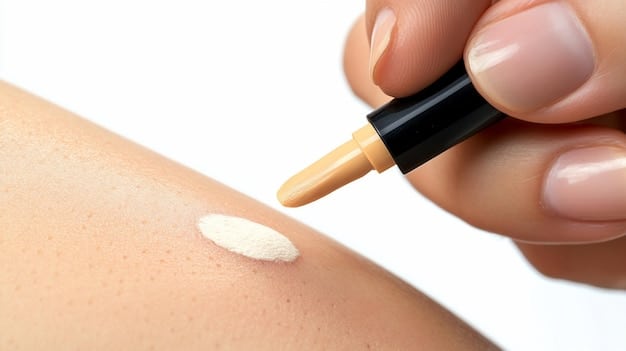
- Stick Concealer: Highly portable and convenient, stick concealers deliver concentrated, full coverage. They are particularly effective for spot concealing blemishes or areas requiring intense neutralization.
Each type demands a slightly different approach to application, from tapping with a finger to blending with a brush or sponge. The choice depends on the area you’re targeting and the desired finish.
Color Correcting vs. Skin-Toned Concealer
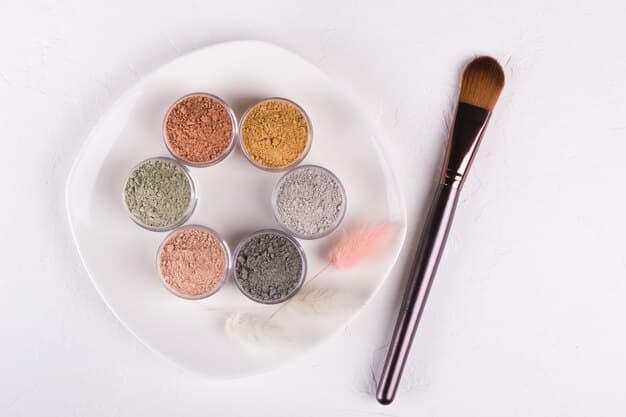
A common misconception is that one concealer can fix everything. This is where color correctors come into play, acting as a crucial preliminary step for certain skin concerns. Color correctors use the principle of complementary colors to neutralize discoloration before applying a skin-toned concealer.
For instance, peach or orange correctors are used to counteract blue or purple under-eye circles, while green correctors neutralize redness from acne or rosacea. Yellow correctors can brighten dullness and purple can counteract yellowness. This two-step process ensures a more natural and less cakey finish, preventing the need for excessive layers of skin-toned product.
Ultimately, a successful concealer strategy begins with a thorough understanding of your specific needs and the diverse tools at your disposal. This foundational knowledge empowers you to make informed choices and apply products with precision, leading to a truly transformed complexion that looks naturally radiant.
Conquering Dark Circles: The Art of Under-Eye Concealing
Dark circles are a common concern, often making us look tired even after a good night’s sleep. While numerous factors contribute to their appearance, from genetics to lifestyle, the right concealer technique can dramatically diminish their visibility. It’s an art that combines color theory with precise application, designed to brighten and lift the under-eye area.
Before diving into application, it’s essential to prep the delicate under-eye skin. Hydration is key; a lightweight eye cream creates a smooth canvas, preventing concealer from settling into fine lines. Allowing the eye cream to fully absorb ensures better adherence and a more seamless finish, making the subsequent steps more effective.

Choosing the Right Shade and Undertone
The secret to banishing dark circles often lies in selecting the correct concealer shade. This typically involves a dual approach:
For neutralizing blue/purple tones:
- Peach/Orange Corrector: If your dark circles have a prominent blue or purple hue, a peach or orange-toned color corrector is your first line of defense. Peach is suitable for fair to medium skin tones, while orange works best for deeper complexions. Apply a thin layer only on the darkest areas.
- Skin-Toned Concealer (Brightening): After color correcting, choose a skin-toned concealer that is one to two shades lighter than your foundation. This lighter shade helps to brighten and lift the area, creating the illusion of more awake eyes. Ensure it has a slightly peachy or yellow undertone to further counteract any remaining bluish tones.
For more subtle dark circles or general brightening, a single skin-toned concealer one shade lighter than your foundation with a yellow or peachy undertone can suffice. The goal is to brighten without creating a stark white “reverse raccoon” effect, maintaining a natural transition with the rest of your face.
Application Techniques for a Seamless Finish
How you apply concealer is just as important as the shade you choose. Over-application or improper blending can draw more attention to the area, rather than concealing it. Here are refined techniques:
- Dot and Blend: Apply small dots of concealer directly onto the darkest areas, typically closer to the inner corner and subtly along the orbital bone. Avoid applying a thick stripe directly under the lash line, as this can look heavy.
- Tapping Motion: Use your ring finger, a damp beauty sponge, or a small, fluffy concealer brush to gently tap and press the product into the skin. Tapping warms the product, helping it meld seamlessly. Avoid swiping or rubbing, which can move product around and create streaks.
- Inner Corner Focus: Pay special attention to the inner corner of the eye, where veins and shadows tend to be most prominent. A small amount of concealer here can significantly brighten the entire eye area.
Feather the edges of the concealer, ensuring a smooth transition into your foundation and the rest of your face. Once blended, a light dusting of translucent powder can set the concealer, preventing creasing and prolonging wear. This meticulous approach transforms tired eyes into a bright, refreshed gaze.
Camouflaging Blemishes: Targeted Concealing for Flawless Skin
Concealing blemishes requires a different strategy than under-eye circles. Here, the goal is not to brighten, but to seamlessly erase, making the imperfection disappear into the surrounding skin. This demands precision, careful shade matching, and a light touch to achieve an undetectable finish.
Before applying any product, ensure the blemish area is clean and moisturized. If a blemish is inflamed or dry, a light, non-comedogenic moisturizer can help create a smoother surface. Avoid picking or irritating the blemish, as this can worsen its appearance and make effective concealment more challenging.
A key principle in blemish concealment is to work in thin layers. Building coverage gradually prevents a heavy or cakey appearance and allows for more natural integration with your skin. This patient approach ensures that the blemish is covered, not highlighted by excess product.
Shade Matching for Imperfections
When concealing blemishes, matching your concealer shade to your foundation or skin tone is paramount. Unlike under-eye concealer, which often benefits from a brighter shade, blemish concealer should blend seamlessly to truly disappear.
- Perfect Match: Select a concealer that exactly matches your skin tone or foundation shade. Test the shade on your jawline or cheek to ensure it blends invisibly.
- Addressing Redness: For active breakouts or highly red areas, a green color corrector can be applied very sparingly as a first layer. Dab a tiny amount directly onto the red area and gently blend the edges before applying your skin-toned concealer. The green neutralizes the red, allowing for less product overall.
Avoid using a concealer that is too light, as this can create a white halo around the blemish, making it more noticeable. The aim is to make the imperfection vanish, not to reflect light off of it.
Precise Application for Undetectable Results
Targeted application is crucial for effectively camouflaging blemishes. This isn’t about broad strokes, but about pinpoint precision:
- Pinpoint Application: Use a very small, firm brush (like a lip brush or fine-tipped eyeliner brush) or the tip of a clean finger to dab a tiny amount of concealer directly onto the center of the blemish.
- Blend the Edges: Gently tap and feather the very edges of the applied concealer outward, allowing it to seamlessly blend into the surrounding skin. Avoid blending over the center of the blemish, as this can remove the coverage you just applied.
- Layer if Necessary: If needed, apply another very thin layer—but only if the initial application hasn’t provided sufficient coverage. Building in thin layers is always better than applying one thick layer.
Once the blemish is successfully concealed, a light pat of translucent setting powder can help to lock the product in place, especially for oily or acne-prone skin. This step also helps to mattify the area, preventing shine from drawing attention to the imperfection. With these techniques, blemishes become a secret only you know.
Choosing the Right Tools: Brushes, Sponges, and Fingers
The success of your concealer application isn’t solely dependent on the product itself; the tool you use plays a significant role. Each application method offers unique benefits, influencing the finish, coverage, and blend. Understanding these nuances allows you to tailor your technique for specific areas and desired outcomes.
Often, beauty professionals use a combination of tools, adapting to the contours of the face and the specific type of imperfection being addressed. Experimentation is key to discovering what works best for your personal style and the products you favor, as different formulas respond differently to various tools.
The Benefits of Each Tool
Consider the distinct advantages each tool brings to the concealing process:
- Fingers: The warmth of your fingertips helps to melt the concealer into the skin, providing a very natural, seamless finish. This method is particularly effective for under-eye concealer, as the gentle tapping motion can prevent dragging the delicate skin.
- Pros: Natural finish, good for warming product, easy to control pressure.
- Cons: Can transfer oils from fingers, less precise for very small blemishes.
- Beauty Sponges: Damp beauty sponges (like the Beautyblender) offer a streak-free, airbrushed finish. Their porous nature allows them to absorb excess product, preventing a cakey look, especially around the eyes.
- Pros: Seamless blending, airbrushed finish, good for larger areas.
- Cons: Absorbs product (can waste), requires frequent cleaning.
- Concealer Brushes: Brushes provide precision and varying levels of coverage depending on their shape and density.
- Pros: Precision for spot concealing, buildable coverage, hygienic.
- Cons: Can leave brush strokes if not blended well, requires cleaning.
Each tool’s strength makes it suitable for different tasks. A finger or damp sponge might be perfect for under-eyes, while a small brush excels at pinpoint blemish coverage.
Selecting the Right Brush for the Job
Concealer brushes come in various shapes, each designed for a specific purpose:
For under-eye application:
- Flat, Tapered Brush: Ideal for applying cream or liquid concealers. The tapered edge allows for precise placement, while the flat side helps to blend.
- Fluffy, Blending Brush: A softer, fluffier brush is excellent for blending out the edges of concealer, particularly around the under-eye area, preventing harsh lines.
For blemish concealment:
- Small, Pointed Brush: This brush is perfect for pinpoint application on small blemishes or scars. Its precise tip ensures product is placed exactly where needed without spreading.
- Flat, Synthetic Brush: A small, flat brush can be used to dab and press concealer onto more textured blemishes, providing full coverage.
Ultimately, the best tool is one that feels comfortable in your hand and allows you to achieve the desired finish. Don’t be afraid to mix and match; a combination of tools often yields the most professional and natural-looking results, optimizing coverage and seamlessness for a truly flawless complexion.
Setting Your Concealer: Longevity and Crease Prevention
Applying concealer perfectly is only half the battle; setting it properly ensures it stays in place all day, resists creasing, and maintains its flawless finish. This crucial step is often overlooked but is fundamental for achieving long-lasting results, especially in areas prone to movement like under the eyes or around the mouth.
Without proper setting, even the best concealer can migrate into fine lines, rub off, or look patchy as the day progresses. The right setting technique locks the product down, extends its wear time, and provides an additional layer of protection against the elements and natural skin oils.
The Power of Setting Powder
Setting powder is the MVP for concealer longevity. It absorbs excess moisture and oil from liquid or cream formulas, creating a matte, smooth surface that prevents product from shifting or creasing. There are two main types of setting powder relevant to concealer:
- Translucent Powder: This is the most popular choice as it doesn’t add coverage or alter the concealer shade. It simply locks the product in place, creating a natural finish. Ideal for all skin tones and most areas.
- Banana Powder: A yellow-toned powder that offers subtle brightening benefits in addition to setting. It’s particularly effective for setting under-eye concealer, helping to further neutralize dark circles and provide an extra lift. Best for medium to deep skin tones.
Both types should be finely milled to ensure a seamless application that doesn’t look heavy or cakey. A very fine powder will blend into the skin, making the set concealer appear undetectable, enhancing the overall natural look of your complexion.
Application Techniques for a Lasting Finish
The method of applying setting powder seriously impacts its efficacy and your overall look:
- Baking (for Under-Eyes): This technique involves applying a generous layer of translucent or banana powder under the eyes using a damp sponge or powder puff. Let it sit (“bake”) for 5-10 minutes, allowing the warmth from your skin to set the concealer. Then, lightly dust off the excess with a fluffy brush. This provides a super long-lasting, creaseless finish and a brightening effect.
- Light Dusting: For blemishes or areas that don’t require intense setting, a light dusting of powder with a fluffy brush is sufficient. Gently *press* the powder onto the concealed area rather than swiping, to avoid disturbing the concealer underneath. This sets the product without creating a heavy layer.
No matter the technique, always ensure your concealer is fully blended and crease-free before applying powder. If there are any visible creases, gently tap them out with your finger or sponge before setting. This prevents the powder from settling into those lines, which would only emphasize them. A well-set concealer remains flawless from morning coffee to evening events, ensuring your perfected complexion stands the test of time.
Common Concealer Mistakes and How to Avoid Them
Even with the best products and intentions, common mistakes can undermine the effectiveness of concealer. Recognizing these pitfalls is the first step toward refining your technique and achieving consistently flawless results. Many errors stem from a lack of understanding product properties or simply rushing the application process.
Avoiding these missteps ensures that your concealer truly enhances your features rather than drawing unwanted attention. It involves a mindful approach to color theory, texture, and application, ensuring every dab and blend contributes to a seamless finish.
Over-Application and Shade Mismatch
These two mistakes are among the most frequent and detrimental:
- Too Much Product: Applying too much concealer, particularly under the eyes, is a common error. Excess product tends to settle into fine lines, crease, and look cakey, making the area appear drier and more textured than it is.
- Solution: Start with a tiny amount and build coverage in thin layers. Remember, less is often more.
- Wrong Shade: Using a concealer that is too light or too dark, or has the wrong undertone, can actually highlight imperfections instead of concealing them. A too-light concealer can create a stark “reverse raccoon” effect under the eyes or a white spot on a blemish.
- Solution: For under-eyes, choose a shade 1-2 shades lighter with a brightening undertone (peach/yellow). For blemishes, match exactly to your skin tone. Always test shades in natural light.
Precision in shade selection and mindful application are key to avoiding these basic, yet significant, blunders. Taking a moment to assess the desired effect and observe your skin in good lighting can make all the difference while applying.
Ignoring Skin Prep and Improper Blending
The foundation (no pun intended) of successful concealer application is often overlooked:
- Skipping Skin Prep: Applying concealer on dry, unmoisturized skin can lead to a patchy, flaky, or creased finish. Concealer clings to dry patches and settles into dehydration lines.
- Solution: Always moisturize the area thoroughly before applying concealer. For under-eyes, use a dedicated eye cream and allow it to absorb fully.
- Poor Blending: Visible lines, streaks, or unblended edges are dead giveaways that concealer has been applied. Harsh lines around the edges of the concealed area make it appear unnatural.
- Solution: Use gentle tapping motions with your finger, a damp sponge, or a soft brush to seamlessly blend the edges of the concealer into your skin and foundation. The goal is an undetectable transition.
- For blemishes: Blend only the edges, leaving the core untouched for maximum coverage.
Avoiding these common concealer mistakes requires a deliberate approach to application, from initial skin prep to the final blend. By understanding how to properly select shades, apply products sparingly, and blend seamlessly, you can achieve a truly natural and flawless complexion that looks like your best skin, not a mask of makeup.
Mastering Concealer for Every Skin Type and Concern
The journey to mastering concealer is deeply personal, as what works for one person might not be ideal for another. Skin types—from dry to oily, mature to acne-prone—and specific concerns demand tailored approaches. A one-size-fits-all strategy rarely yields the best results; instead, a nuanced understanding of your unique skin profile is essential.
This personalized approach extends beyond product selection to include particular application methods and even the frequency of touch-ups throughout the day. Adapting your concealer routine ensures maximum effectiveness and a natural-looking finish, no matter your skin’s characteristics or specific challenges.
Tailoring Concealer for Dry and Mature Skin
Dry and mature skin types often battle creasing and emphasizing fine lines:
- Hydration First: For dry and mature skin, intense hydration is non-negotiable. Use rich eye creams and facial moisturizers to plump the skin before concealer application. This minimizes the appearance of fine lines and prevents concealer from settling into them.
- Creamy Formulas: Opt for hydrating, luminous, or serum-based liquid concealers. Avoid matte or thick formulas, which can cling to dry patches and accentuate texture.
- Minimal Powder: Use setting powder very sparingly, or skip it altogether for a more natural, dewy finish. If necessary, a light pat of finely milled hydrating powder is best, applied only where absolutely needed.
The goal for these skin types is to achieve coverage while maintaining a youthful, hydrated appearance. Less is often more, focusing on thin, blendable layers that move with the skin.
Concealer Strategies for Oily and Acne-Prone Skin
Oily and acne-prone skin require a different set of considerations, primarily centered on oil control and preventing breakouts:
- Oil-Free and Non-Comedogenic: Choose concealers specifically formulated as oil-free and non-comedogenic (won’t clog pores). Many brands offer long-wearing, matte-finish concealers suitable for oily skin.
- Targeted Application: For active breakouts, use a precise, small brush to apply concealer directly to the blemish, blending only the edges. This minimizes product application to areas where it’s not needed and prevents a heavy look.
- Strategic Setting: Setting with a lightweight, translucent powder is crucial to absorb excess oil and extend wear time. Consider “baking” in areas prone to shine for extra longevity.
Additionally, for acne-prone skin, ensure your brushes and sponges are meticulously clean to prevent transferring bacteria. A consistent approach to product selection and diligent application ensures effective blemish control without exacerbating skin concerns or creating an undesirable, heavy finish.
Beyond the Basics: Advanced Concealer Techniques
Once you’ve mastered the foundational steps of concealing dark circles and blemishes, you can explore more advanced techniques to truly elevate your complexion. These methods leverage concealer’s versatility to sculpt, brighten, and refine your overall look, transforming it from a simple corrective tool to a strategic makeup enhancer.
Advanced techniques often involve using multiple concealer shades or applying concealer in unconventional areas to create specific effects. They require a deeper understanding of light and shadow, allowing you to manipulate dimension and bring out your best features while maintaining a natural appearance.
Brightening and Lifting with Concealer
Concealer isn’t just for covering; it can also sculpt and brighten:
- Triangle of Light: Instead of drawing a crescent moon shape under your eyes, draw an inverted triangle with the base under your lash line and the point extending down towards your cheek. This larger area of brightness not only conceals dark circles but also helps to lift and illuminate the center of your face, creating a more awake and youthful appearance.
- Brow Bone and Inner Corner: A tiny dot of a very light, luminous concealer on the brow bone (under the arch) and in the inner corner of your eyes can create an instant lift and open up the eyes. Blend meticulously for a subtle highlight.
These techniques use a slightly lighter-than-skin-tone shade, focusing on strategic placement to enhance facial features beyond mere coverage. The subtle play of light creates an illusion of lift and definition, making your face appear more sculpted and radiant, without the need for additional contouring products.
Concealer for Contouring and Highlighting
In addition to brightening, concealer can also be used for subtle contouring and highlighting, especially for a natural, “no-makeup makeup” look:
- Subtle Contouring: Choose a concealer shade that is 1-2 shades darker than your skin tone and has a cool or neutral undertone. Apply thin lines in areas you want to recede, such as the hollows of your cheeks, along your jawline, or on the sides of your nose. Blend thoroughly for a soft, natural shadow that defines features without harsh lines.
- Cream Highlighting: Select a concealer that is 2-3 shades lighter than your skin tone and has a radiant or luminous finish. Apply it to the high points of your face: the tops of your cheekbones, the bridge of your nose, your cupid’s bow, and the center of your forehead. Tap it into the skin for a natural, lit-from-within glow that mimics the effect of a cream highlighter.
Using concealer for contouring and highlighting allows for a lighter, more seamless base compared to traditional cream contour sticks. It’s an excellent method for achieving subtle definition and luminosity, complementing your perfected complexion with added dimension that looks effortlessly natural and refined.
| Key Concealer Secret | Brief Description |
|---|---|
| 🎨 Color Correction | Neutralizes discolouration (e.g., peach for dark circles, green for redness) before skin-toned concealer for a natural finish. |
| ✨ Proper Shade Matching | Under-eyes: 1-2 shades lighter with brightening undertone. Blemishes: exact match to skin tone for invisibility. |
| 👆 Gentle Blending | Tap, don’t rub, with fingers, damp sponge, or brush to seamlessly meld product into skin and prevent creasing. |
| ⏳ Setting for Longevity | Lightly dust with translucent or banana powder to lock concealer in place, prevent creasing, and extend wear. |
Frequently Asked Questions about Concealer
For dark circles, select a concealer that is one to two shades lighter than your foundation and has a peachy or yellow undertone. Peach tones neutralize blue/purple hues, while yellow brightens. Always test the shade in natural light to ensure it blends seamlessly without appearing too stark or gray.
Always apply color corrector before your skin-toned concealer. The color corrector neutralizes the discoloration (e.g., orange for dark circles, green for redness), allowing you to use less regular concealer and achieve a more natural, less cakey finish. Blend the corrector thinly before adding concealer.
To prevent creasing, ensure your under-eye area is well-hydrated before applying. Use a thin layer of concealer, tapping it in gently. Before setting, gently tap out any existing creases with your finger or a sponge. Then, immediately set with a very thin layer of finely milled translucent powder using a light hand or by “baking.”
While possible, it’s often not ideal. Dark circles usually benefit from a slightly lighter, brightening concealer with a peachy/yellow undertone, while blemishes require an exact skin-tone match to disappear. Using a concealer that’s too light on a blemish can make it more noticeable. Having two shades often yields better results.
For a natural finish, fingers or a damp beauty sponge are excellent. The warmth from your fingers helps melt the product into the skin for a seamless blend. A damp sponge provides an airbrushed, streak-free look by absorbing excess product. Brushes offer precision, but may require more blending to avoid streaks.
Conclusion: The Art of a Perfect Complexion
Mastering the art of concealer is truly about understanding your skin’s unique needs and applying expert techniques with precision and patience. From neutralizing stubborn dark circles to seamlessly erasing blemishes, the journey involves selecting the right shades and formulas, utilizing appropriate tools, and implementing strategic application and setting methods. By adopting these refined “Concealer Secrets,” you’re not just covering imperfections; you’re cultivating a foundation of confidence, revealing a complexion that looks naturally radiant and flawlessly even. Embrace these insights, and unlock the transformative power of concealer for your most perfect skin yet.


