Color Correcting 101: Neutralize Imperfections for a Flawless Canvas
Anúncios
Color correcting is a makeup technique that uses contrasting hues to neutralize skin discolorations, such as redness, dark circles, or sallowness, creating an even, balanced base for foundation and concealer application.
Mastering color correcting can be a game-changer in your makeup routine, transforming problematic skin tones into a smooth, uniform canvas. This nuanced approach goes beyond just covering up, using the science of color to neutralize imperfections before they even get a chance to show through your foundation. It’s an essential step for anyone seeking a truly flawless complexion, whether dealing with subtle redness or more pronounced discolorations. Let’s delve into the fundamentals of this technique.
Anúncios
The science behind color correcting: understanding the color wheel
Color correcting isn’t magic; it’s a practical application of color theory. Understanding how colors interact is the first step toward effective neutralization. Think of the color wheel you may have learned about in art class—it’s your ultimate guide for selecting the right color corrector.
On the color wheel, colors directly opposite each other are known as complementary colors. When mixed, or layered, these colors cancel each other out. This principle is the cornerstone of color correcting in makeup. For instance, red is opposite green on the color wheel. Therefore, a green color corrector will neutralize redness on the skin. Similarly, orange is opposite blue, so an orange corrector will counteract blue undertones, commonly found in dark circles.
Complementary colors in action
Applying this theory to your skin means identifying the specific discoloration you want to address and then selecting its complementary shade. This targeted approach ensures that you’re not just piling on more makeup, but actually correcting the underlying skin tone issue before applying your regular foundation and concealer. The goal is to create a neutral base, not to add more color to your face. The right application can make a significant difference in the final look of your makeup, providing a smooth canvas where foundation can truly shine.
Anúncios
- Green vs. Red: Green neutralizes redness, such as blemishes, rosacea, or flushed areas.
- Orange/Peach vs. Blue/Purple: Orange or peach neutralizes blue or purple undertones, typically found in dark undereye circles or bruises.
- Yellow vs. Purple: Yellow corrects purple/blue veins and brightens dull areas.
- Blue vs. Orange/Sallowness: Blue balances out orange tones, often used for correcting fake tan mishaps or extreme sallowness.
The success of color correcting lies in its precise application. You’re not looking to cover your entire face with a corrector; instead, you’re targeting specific areas with minimal product. This strategic approach ensures that your skin doesn’t end up looking muddied or overly caked. It allows your natural skin tone to look more even, making your foundation and concealer work more effectively by requiring less product to achieve coverage. The key is to blend meticulously and build up the coverage in thin layers, ensuring a seamless transition and an overall more balanced complexion.
Identifying your skin concerns: knowing what to neutralize
Before you even pick up a color corrector, it’s essential to accurately identify the specific discoloration you’re trying to neutralize. Different skin concerns require different corrective shades. A common mistake is to grab a general “color correcting palette” without understanding the unique needs of your own skin. Taking a moment to assess your complexion in good, natural light can help you pinpoint the exact issues you’re facing. For instance, are your dark circles truly blue, or do they lean more purple?
Common skin discolorations and their solutions
Each type of imperfection has a corresponding color corrector designed to counteract it. Knowing your specific concern ensures you pick the right tool for the job.
- Redness (blemishes, rosacea, broken capillaries): This is one of the most common concerns. Areas affected by redness can make your skin appear irritated or uneven.
- Dark Circles (under-eye area): These can range from bluish to purplish or even brownish tones, depending on your skin tone and ethnicity.
- Dullness or Sallowness: Sometimes the skin can look tired, grayish, or have a yellowish cast, making the complexion appear unhealthy.
- Hyperpigmentation (dark spots, sun spots, melasma): These spots can be brown or dark brown and require specific neutralization to blend seamlessly with the surrounding skin.
Understanding the nuances of your skin’s undertones also plays a crucial role in effective color correcting. If your dark circles appear more purple, a peach corrector might be more effective than a true orange. Similarly, if your hyperpigmentation leans more grey, a yellow-based corrector might work better than a pure orange. This personalized approach to color correcting ensures that you are truly targeting the problem and not just masking it, leading to a much more natural and refined finish. Always start with a small amount of product; a little goes a long way in color correction. Over-applying can lead to a muddy appearance and make your foundation look heavy.
A guide to color corrector shades and their uses
Once you’ve identified your specific skin concerns, it’s time to delve into the array of color corrector shades available. Each shade serves a unique purpose, meticulously crafted to address various types of discoloration. Picking the right one is paramount for achieving a seamless, flawless base.
Decoding the color-correcting palette
The beauty industry offers a wide range of color correctors, from creamy sticks to liquid formulas. While the textures may vary, their primary function remains consistent: utilizing complementary colors to neutralize unwanted tones. Here’s a detailed breakdown of the most common shades and their applications:
- Green Correctors: Specifically formulated to combat redness. Perfect for areas with acne breakouts, rosacea, visible capillaries, or general redness around the nose and cheeks. A thin layer is usually sufficient to tone down the red without making your skin look ashy.
- Peach/Orange Correctors: These are your go-to for neutralizing blue or purple undertones. Peach shades work best for fair to medium skin tones to hide dark circles, while deeper orange tones are more effective for medium to dark skin tones to tackle stubborn blue/purple or even green-ish undertones.
- Yellow Correctors: Ideal for brightening dull areas and neutralizing purple or blue veins. They can also be used to counteract mild redness, though green is typically more effective for pronounced red areas. Yellow is excellent for adding overall warmth to the skin, making it appear more radiant and less tired.
- Purple/Lavender Correctors: Designed to counteract yellow tones and sallowness. If your skin appears dull or has a yellowish cast, a purple corrector can instantly brighten it and give it a healthier, more vibrant look. It’s also useful for dullness that sometimes appears after an illness or lack of sleep.
- Blue Correctors: Less commonly used, blue correctors are helpful for neutralizing excessive orange tones, often occurring from self-tanner mishaps or an overly warm foundation. They can also be used to slightly cool down a complexion that looks too warm.
The key to successful color correcting lies in applying a very thin, precise layer of product only where needed. Over-application can make your foundation look cakey or leave a visible tint on your skin. Blend the product out softly with your finger, a small brush, or a damp beauty sponge, allowing it to meld seamlessly with your skin before moving on to your foundation. Remember, the goal is to neutralize, not to completely cover, as your foundation will follow to provide coverage. The subtle adjustment of undertones is what makes the final result look so natural and polished.

Prep and prime: laying the groundwork for perfection
Before you even think about applying color correctors, the foundation of a flawless canvas begins with proper skin preparation. Skipping this crucial step can undermine all your efforts, making your makeup look uneven or short-lived. A well-prepped complexion ensures that your correctors and subsequent makeup products adhere smoothly and blend seamlessly, leaving you with a long-lasting and natural finish. This is where skin care meets makeup artistry, creating the perfect synergy.
The essential steps for skin preparation
Preparing your skin isn’t just about cleansing; it’s about hydrating, smoothing, and creating a barrier that protects your skin while allowing makeup to sit beautifully. Think of it as painting on a canvas – you wouldn’t start painting on an unprepared surface.
- Cleanse: Start with a gentle cleanser to remove any impurities, excess oil, and traces of previous makeup. A clean slate is non-negotiable for any makeup application.
- Hydrate: Apply a suitable moisturizer for your skin type. Hydrated skin is plumper, smoother, and provides a better surface for makeup. Allow the moisturizer to fully absorb before proceeding.
- Prime: A good primer is your secret weapon. It creates a smooth, even surface, minimizes the appearance of pores, and helps your makeup last longer. Choose a primer that addresses your specific skin concerns, whether it’s for oil control, hydration, or blurring imperfections. Some primers even have color-correcting properties for subtle neutralization, like a green-tinted primer for overall redness.
After these steps, your skin is ready to receive the color correctors. The primer acts as a buffer, preventing the correctors from sinking into your pores and ensuring they sit on the skin’s surface, where they can effectively neutralize discoloration. This meticulous groundwork not only improves the look of your makeup but also contributes to its longevity, ensuring you maintain that flawless canvas throughout the day. Remember, patience in preparation pays off immensely in the final result, making every subsequent step of your makeup routine more effective and impactful.
Application techniques: from correcting to concealing
The success of color correcting hinges on precise application. It’s not about slathering product everywhere; rather, it’s about strategically neutralizing specific areas. The goal is to apply just enough product to cancel out the unwanted tone without creating a noticeable layer. Over-applying can lead to a muddy or cakey appearance once you apply foundation. This delicate balance is what sets apart a professional finish from a beginner’s attempt.
Mastering the art of precise application
The technique you use to apply and blend your color correctors will significantly impact the final result. Different areas of the face and different types of imperfections may require slightly varied approaches.
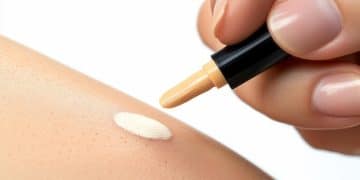
- Targeted Application: Apply a very small amount of color corrector directly onto the discolored area using a thin, precise brush or your fingertip. For instance, for a blemish, dot the green corrector only on the red spot. For dark circles, apply the peach/orange corrector only where the darkness is most prominent.
- Blending is Key: Once applied, gently tap or pat the product into the skin, blending outwards from the center of the discoloration. Avoid rubbing, as this can move the product around or remove it entirely. The goal is to blend the edges seamlessly into your natural skin tone. A damp beauty sponge can also be effective for this step, pressing the product into the skin.
- Layering: After the color corrector is blended, allow it to set for a minute. Then, apply a thin layer of your regular foundation over your entire face. Use a patting motion rather than swiping to avoid disturbing the corrector underneath. Your foundation should now cover the neutralized discoloration much more effectively.
- Concealer for Final Touches: If any minor discoloration still peeks through, follow up with your regular concealer over those specific spots. Choose a concealer that matches your skin tone or is one shade lighter, designed to brighten. Again, tap or pat to blend.
Remember, less is always more in color correcting. Start with a tiny amount and build if necessary. The aim is for the color corrector to be invisible once your foundation is applied. If you can still see a hint of green or peach, you may have applied too much or didn’t blend it sufficiently. Practice makes perfect, and with a bit of patience, you’ll master the art of creating a flawlessly uniform canvas.
Choosing the right formulas: creams, liquids, and sticks
Just as important as choosing the right shade is selecting the appropriate formula for your color corrector. Color correctors come in various textures—creams, liquids, and sticks—each with its own advantages and best uses. The type of formula you choose can impact ease of application, coverage, and how well it integrates with your other makeup products. Understanding these differences will help you make an informed decision based on your skin type, concern, and personal preference.
Formula variations and their ideal applications
The texture of your color corrector can make a significant difference in the final look and feel of your makeup. Consider your skin type and the specific area you’re treating when making your selection.
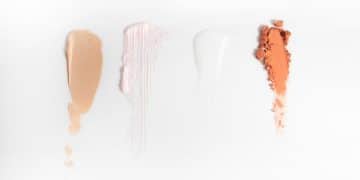
- Liquid Correctors: These are lightweight and offer sheer to medium coverage. They are excellent for larger areas of discoloration, such as overall redness, or for sensitive areas like under the eyes, where you don’t want a heavy feel. Liquid formulas blend out very easily and are ideal for those who prefer a natural, skin-like finish. They are generally suitable for all skin types, especially normal to dry skin.
- Cream Correctors: Offering medium to full coverage, cream correctors are versatile and come in pots or palettes. They are effective for targeted application on specific spots like blemishes, hyperpigmentation, or pronounced dark circles. Cream formulas are known for their blendability and can work well on most skin types, though those with very oily skin might prefer to set them with a powder.
- Stick Correctors: These are typically denser and provide higher coverage, making them perfect for precise, heavy-duty correction of very localized and stubborn imperfections, such as deeply pigmented spots or very red blemishes. Their solid form allows for direct application and minimal mess. They are often best for normal to oily skin types due to their creamier, more concentrated texture.
When selecting a formula, also consider how it will interact with your foundation and concealer. For instance, if you use a liquid foundation, a liquid or thin cream corrector might layer best. If you prefer a cream or stick foundation, a cream or stick corrector could be a good match. Always ensure that the textures are compatible to avoid pilling or patchiness. Testing different formulas can help you discover what works best for your skin and your overall makeup routine, contributing to a truly flawless and long-lasting finish.
Common mistakes to avoid for a truly flawless finish
While color correcting can be a game-changer, it’s also a technique where mistakes can easily undermine your efforts. Achieving that perfectly flawless, neutralized canvas requires more than just knowing which colors to use; it demands precision and an understanding of common pitfalls. Avoiding these blunders ensures your skin looks even and natural, rather than caked or ashy.
Pitfalls in color correcting and how to sidestep them
Being aware of common mistakes can help you refine your technique and achieve professional-level results. It’s often the small details that make the biggest difference.
- Over-Application: This is arguably the most common mistake. Applying too much color corrector leads to a visible tint on the skin, which can peek through your foundation and make your complexion look unnatural or muddy. Always start with a tiny amount and build if necessary. Remember, the goal is to neutralize, not to completely mask.
- Incorrect Shade Selection: Using the wrong color corrector for your specific discoloration will not provide effective neutralization. For example, using yellow for blue dark circles won’t be as effective as using peach/orange, and it might even make the area look dull. Always refer to the color wheel and accurately identify your skin concern.
- Lack of Blending: Not blending the edges of the color corrector seamlessly into the surrounding skin can create harsh lines or visible patches of color. This results in an uneven base that your foundation will struggle to cover smoothly. Use gentle patting motions to ensure the product melts into the skin.
- Applying Correctors Over Foundation: Color correctors should always be applied before foundation and concealer. Applying them over your base makeup won’t neutralize effectively and can lead to a messy, patchy appearance. They are meant to be the first step in creating that even canvas.
- Using Too Many Correctors: While it might be tempting to use multiple shades for various concerns, trying to correct too many areas or using too many different colors can lead to a muddy, heavy look. Focus on your primary concerns and address them strategically. Sometimes, simply using a good long-wear concealer might be sufficient for minor imperfections without the need for color correction.
By being mindful of these common mistakes, you can significantly improve your color correcting technique. The aim is to create a seamless, natural-looking base that allows your foundation to work more effectively, without needing to apply heavy layers. With practice and attention to detail, you’ll master the art of targeted neutralization, achieving a truly flawless and radiant complexion that looks like your skin, but better.
| Key Aspect | Brief Description |
|---|---|
| 🎨 Color Theory | Uses complementary colors to neutralize discolorations (e.g., green for red, peach for blue). |
| 🔍 Identify Concerns | Crucial to accurately identify specific discoloration (redness, dark circles, sallowness) before applying. |
| ✨ Proper Application | Apply thinly and precisely, blending seamlessly before foundation and concealer. |
| 🚫 Avoid Mistakes | Prevent over-application, incorrect shade use, or poor blending for a natural finish. |
Frequently Asked Questions about Color Correcting
Color correcting is a makeup technique that uses contrasting hues to neutralize specific skin discolorations like redness, dark circles, or sallowness. It’s important because it creates a balanced, neutral base, allowing your foundation and concealer to work more effectively and achieve a more natural, flawless finish without appearing heavy or cakey.
Choosing the right color corrector relies on understanding the color wheel. You select a shade that is complementary to the discoloration you want to neutralize. For example, green for redness, peach/orange for blue/purple dark circles, and yellow for purple veins or dullness. Identify your specific concern in natural light for best results.
Always apply color corrector before your foundation and concealer. It acts as a primary layer to neutralize unwanted tones on your bare skin. Applying it after foundation can disrupt your base makeup and prevent the corrector from effectively canceling out the discoloration, leading to a less seamless and more visible result.
Yes, color correctors are very effective for camouflaging acne. Green color corrector is specifically designed to neutralize redness. Apply a very thin layer directly onto the red blemish, gently blending the edges. This will help reduce the appearance of the redness, making it easier for your concealer and foundation to provide full, natural-looking coverage.
When color correcting, less is definitely more. You should use the absolute minimum amount of product needed to neutralize the discoloration. A tiny dot or a very sheer layer is usually sufficient. Over-application can lead to your skin appearing muddy, ashy, or having a visible tint that peeks through your foundation.
Conclusion
Color correcting is far from a mere trend; it is a sophisticated technique rooted in color theory, offering a pathway to a genuinely flawless complexion. By understanding the interplay of complementary colors and applying correctors strategically, you can transform your skin’s undertones, neutralizing imperfections that even the best foundations struggle to hide. This process isn’t about covering up; it’s about correcting and refining, allowing your natural beauty to shine through with an even, radiant base. Embracing color correcting empowers you to address specific skin concerns with precision, achieving a harmonious canvas that is the epitome of a professional makeup finish. With practice and the right tools, anyone can master this art, elevating their makeup routine from simple coverage to true artistry.
