Master Eyeshadow Blending: A Step-by-Step Guide for Beginners
Anúncios
Mastering eyeshadow blending is crucial for achieving professional-looking makeup, transforming a simple application into a polished, seamless finish that enhances eye shape and color with depth and dimension, foundational for any aspiring beauty enthusiast.
Embarking on the journey of makeup artistry often feels akin to navigating a complex landscape, especially when it comes to eye makeup. Among the myriad techniques, mastering the art of eyeshadow blending: a step-by-step guide for beginners stands out as a true game-changer, elevating your look from amateur to exquisite.
The Foundation: Understanding Your Tools and Products
Before diving into the artistry of blending, it is paramount to understand the essential tools and products at your disposal. Much like a painter needs the right brushes and pigments, a makeup artist relies on specific brushes and high-quality eyeshadows to achieve a flawless blend. This foundational knowledge ensures you’re building on a solid base, avoiding common pitfalls that can hinder your blending efforts.
Essential Brushes for Seamless Blending
The type of brush you choose significantly impacts the outcome of your eyeshadow application. Different brushes are designed for specific tasks, from packing on color to diffusing harsh lines. Selecting the right tools for each step is crucial for achieving that seamless, professional finish.
- fluffy blending brush, ideal for diffusing harsh edges and creating smooth transitions.
- A flat shader brush, perfect for packing color onto the eyelid with intensity.
- A pencil brush, for precise application in the crease or along the lash line.
Investing in a few good quality brushes will make a world of difference. Synthetic bristles are excellent for cream and liquid products, while natural bristles excel with powder eyeshadows, picking up and distributing pigment evenly. Cleaning your brushes regularly also ensures optimal performance and prevents color muddiness.
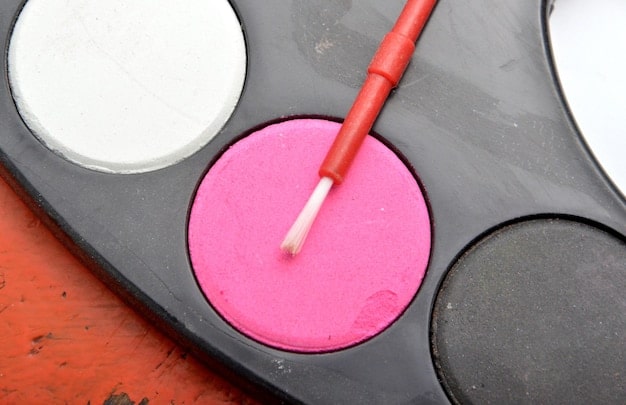
Selecting Your Eyeshadow Palette
The palette you choose sets the mood and tone for your entire eye look. For beginners, it’s wise to start with neutral tones. These shades are forgiving and versatile, allowing you to practice blending techniques without the added pressure of deciphering complex color theory. As you gain confidence, you can gradually introduce more vibrant and challenging hues.
Pay attention to the eyeshadow formula. Highly pigmented shadows blend more easily and offer better color payoff, meaning less effort for a more impactful result. Matte finishes are ideal for the crease and for defining the eye, while shimmers and metallics add dimension and highlight. Experiment with different textures to see what works best for your desired aesthetic.
Understanding these fundamental aspects—the right brushes and suitable eyeshadows‖lays the groundwork for successful blending. Without a proper understanding of your tools and materials, even the most dedicated practice may not yield the desired results. Taking the time to properly equip yourself is an investment in your blending journey.
Preparing Your Canvas: Priming for Perfection
Just as an artist prepares their canvas, so too must you prepare your eyelids for eyeshadow application. Proper eyelid preparation is often overlooked but is a critical step that ensures your eyeshadow applies smoothly, adheres richly, and blends effortlessly. This stage actively combats common issues like creasing and fading, allowing your hard work to truly shine through.
The Power of Eyeshadow Primer
An eyeshadow primer serves multiple vital functions. Firstly, it creates a smooth, even base for the eyeshadow, allowing colors to appear more vibrant and true to their pan. Without primer, the natural oils on your eyelids can cause eyeshadow to patch, fade, and crease throughout the day, diminishing the longevity and impact of your look.
Secondly, primer provides a tacky surface that helps eyeshadow pigments adhere better. This enhanced adhesion is crucial for blending, as it prevents colors from becoming patchy or muddy, allowing for smoother transitions between shades. Think of primer as the bridge between your skin and the product, ensuring a seamless connection.
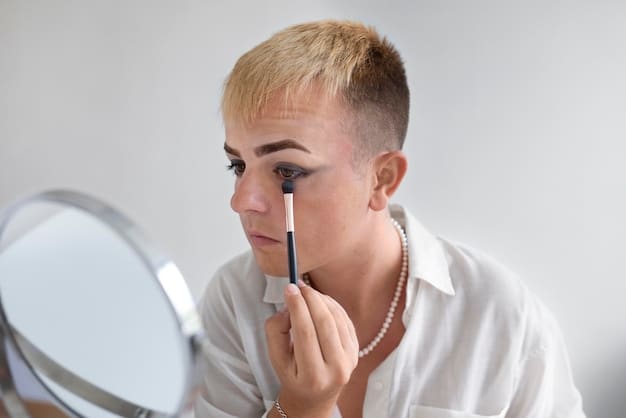
Application Techniques for Primer
Applying primer correctly is straightforward but essential. A small, pea-sized amount is usually sufficient for both eyelids. Gently dab the primer onto your lid using your fingertip or a flat synthetic brush and pat it evenly across the entire eyelid, from the lash line up to the brow bone. Be sure to extend it into the inner and outer corners of your eye.
- Ensure an even, thin layer for optimal results.
- Allow approximately 30-60 seconds for the primer to set and become slightly tacky.
- Avoid applying too much primer, as this can make blending more difficult or cause creasing.
Once your primer is set, you’ll feel a subtle tackiness when you gently touch your eyelid. This indicates that your canvas is perfectly prepared and ready for the next step—applying your base color. Neglecting this crucial step is a disservice to your blending efforts, as it undermines the stability and vibrancy of your eyeshadow application from the outset.
The Art of Base Color Application
With your eyelids primed, the next step is to apply a base color. This initial layer is fundamental, acting as the foundation upon which all other eyeshadows will be built and blended. A well-applied base color not only evens out the skin tone of your eyelid but also helps subsequent shades adhere more smoothly and appear more vibrant.
Choosing Your Base Shade
For most looks, a neutral, matte eyeshadow shade that closely matches your skin tone or is slightly lighter makes an excellent base. This isn’t where you introduce deep or vibrant colors; rather, it’s about creating a clean, uniform canvas. Think of soft ivories, light beige, or even a very pale peach, depending on your complexion.
The base shade serves to cancel out any redness or discoloration on your eyelid, providing a consistent backdrop for your more intricate blending. This step is particularly important for those with visible veins or uneven pigmentation, as it ensures the true color of your subsequent eyeshadows will be visible.
Techniques for Applying the Base
Using a large, fluffy shader brush, gently sweep the chosen base shade across your entire eyelid, extending from the lash line all the way up to just below your brow bone. The goal here is a thin, even layer. You don’t need intense pigmentation; rather, uniformity is key.
- Lightly tap off any excess product from your brush before applying to avoid fallout.
- Use gentle, sweeping motions to distribute the color evenly.
- Ensure the base is applied smoothly, avoiding any patchy areas.
This base layer provides an ideal surface for seamless blending. The slightly powdery finish of the base color allows other shadows to melt into it effortlessly, reducing friction and preventing them from dragging. Without this foundational layer, blending darker or more intense colors can become significantly more challenging, often resulting in unblended lines.
The base color is your secret weapon for smoother transitions and enhanced color payoff. It’s the unsung hero that allows your blending journey to truly begin on the right foot, ensuring that every shade you apply next has the perfect surface to adhere to and beautifully diffuse.
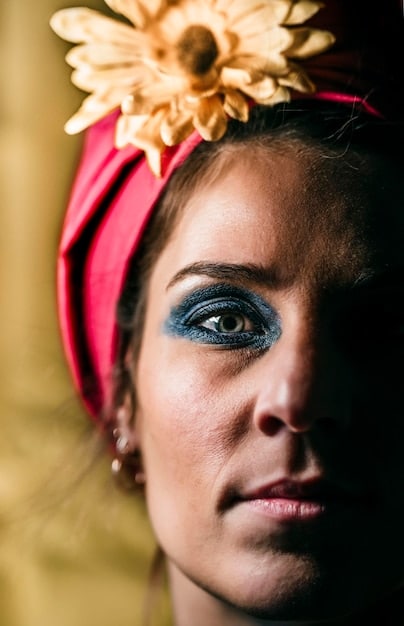
Building Depth: Crease and Outer V Application
Once your base color is set, the true artistry of creating depth and dimension begins with the application of color to the crease and outer V. These areas are crucial for shaping the eye and adding intensity, making your eyes appear larger, more defined, and captivating. This step is where seamless blending truly comes into play to meld colors together.
Defining the Crease
The crease is the natural fold above your eyelid. Applying a slightly deeper, transition shade here helps to create definition and acts as a bridge between your base color and any darker shades you introduce later. This transition shade should be a neutral tone a few shades darker than your skin, such as a soft brown or taupe.
Using a fluffy blending brush, apply the transition shade into your crease using gentle, windshield-wiper motions. The aim is to build the color gradually, diffusing it upwards and outwards towards your brow bone. Avoid pressing too hard; light pressure allows for better blendability and prevents harsh lines. This step prepares the eye for deeper colors, ensuring they don’t look isolated.
Intensifying the Outer V
The outer V is the outer corner of your eye, forming a V-shape where your upper lash line meets your crease. Applying a darker shade here adds significant depth and intensity, creating a smoking effect or defining the eye shape. Choose a shade significantly darker than your transition color, such as a deep brown, charcoal, or even a dark plum.
With a smaller, denser blending brush or a pencil brush, gently dab the darker shade onto the outer V. Start with a small amount of product and build up the intensity gradually. Once the color is placed, use small, circular motions to blend it inwards, very slightly into the outer third of your crease, and along the outer lash line. The goal is a gradient, not a harsh block of color.
- Work with small amounts of product to avoid over-pigmentation.
- Blend in small circular motions or soft back-and-forth sweeps.
- Always have a clean blending brush on hand to soften edges.
The interplay of colors in the crease and outer V is what gives your eye makeup its professional, dimensional quality. It requires patience and a light hand, but with practice, you’ll master the art of building depth that enhances your natural eye shape. Remember, the key is to blend, blend, blend until there are no visible lines separating the colors.
The Blending Mastery: Softening Edges and Transitions
This is where the magic happens and where many beginners face their biggest challenge. True mastery of eyeshadow blending lies in the ability to seamlessly soften edges and create an invisible transition between multiple shades. It’s the difference between disjointed patches of color and a harmonious, gradient look that appears effortlessly polished.
Techniques for Seamless Blending
The secret to perfect blending is a combination of the right brush, light pressure, and consistent-but-gentle movements. After applying each layer of eyeshadow, take a clean, fluffy blending brush. This is your most valuable tool for this step, as it allows you to diffuse product without adding more.
Hold the brush at the very end of its handle; this naturally encourages a lighter touch. Use sweeping, windshield-wiper motions back and forth along the edges where two colors meet. For more precise blending in tighter areas, use small, delicate circular motions. The goal is to “marry” the colors, eliminating any harsh lines or abrupt changes.
- Always use a clean blending brush for the final blend.
- Work in light layers, building intensity rather than packing on color at once.
- Consistently check your blend from different angles and in various lighting.
Patience is paramount here. It’s often tempting to rush, but taking your time with blending will yield significantly better results. If you feel you’ve applied too much pressure or too much product, don’t panic. Simply go back in with a clean, un-pigmented blending brush and continue to diffuse the edges until they vanish.
Troubleshooting Common Blending Issues
One common issue is patchy eyeshadow. This often happens from not priming properly, using too much product, or not blending enough. To fix, reapply a thin layer of your base color and gently buff over the patchy area with a clean brush. If colors look muddy, it means you’re mixing too many different shades without blending them adequately. Focus on blending each shade into the next before introducing a new one.
Another tip is to occasionally step back from the mirror. Sometimes, being too close can make you miss the overall effect of your blending. Taking a step back allows you to see if the colors are flowing into each other cohesively, or if there are still any harsh lines. The final result should look like a gradient, where one color melts into the next without a distinct start or end.
Mastering this blending stage is transformative. It’s what makes eyeshadow look sophisticated and professional. With consistent practice, your hand will become steadier and your eye more discerning, allowing you to achieve truly seamless transitions every time.
Highlighting and Finishing Touches
After you’ve meticulously built and blended your eyeshadows, the final steps involve adding highlights and refining the overall look. These finishing touches are vital for brightening the eyes, adding a touch of glamour, and ensuring your hard work truly stands out, tying the entire eye makeup together for a polished appearance.
Strategic Highlighting for Brightness
Highlighting specific areas of your eye makeup instantly lifts and brightens, creating an illusion of wider, more awake eyes. The two primary areas for highlighting are the brow bone and the inner corner of the eye. Choose a light, shimmery, or matte shade that complements your overall eye look for these areas.
For the brow bone, apply a subtle highlight directly under the arch of your eyebrow and blend it downwards into your transition shade. This lifts the brow and creates a soft, luminous effect. For the inner corner, use a small pencil brush or your fingertip to dab a bright, shimmery shade into the innermost corner of your eye. This instantly brightens and opens up the entire eye area, making you look more refreshed.
- Apply highlight sparingly; a little goes a long way.
- Ensure the highlight blends seamlessly into the surrounding shadow.
- Experiment with different highlight shades to find what best complements your skin tone.
The choices of highlight can vary. A champagne or pearl shade is universally flattering, while a soft gold or rose gold might better suit warmer skin tones. The key is to select a shade that adds light without drawing too much attention away from your main eyeshadow shades.
Liner, Mascara, and Final Fixes
Once your eyeshadow is perfected, eyeliner and mascara are the non-negotiable duo that completes the eye makeup. Eyeliner defines the lash line, making lashes appear fuller, while mascara adds volume and length, framing your eyes beautifully. For beginners, a simple tightline or a thin line along the upper lash line is sufficient.
Before applying liner or mascara, take a moment to assess the entire eye look. Use a clean, fluffy brush to buff away any stray fallout from under your eyes. If needed, a small flat brush with a touch of concealer can sharpen the edge of your eyeshadow on the outer corner, creating a crisp, lifted effect for a more defined look. This “clean-up” step ensures your blending efforts aren’t overshadowed by any smudges or powder residue.
Finally, curl your lashes and apply your favorite mascara, building up layers for desired volume. These last steps transform your blended eyeshadow into a complete, captivating eye look. Mastering these finishing touches ensures that your eyeshadow blending efforts are truly showcased, bringing the entire artistry to a magnificent closure.
Common Blending Mistakes and How to Avoid Them
While mastering eyeshadow blending is a rewarding journey, beginners often encounter a few common pitfalls that can hinder their progress. Recognizing these mistakes and understanding how to rectify or prevent them from the outset can significantly accelerate your learning curve and lead to more satisfying results. Precision and patience are paramount.
Over-blending and Under-blending
One prevalent mistake is either over-blending or under-blending. Over-blending happens when you blend too much, causing colors to become muddy and lose their distinctiveness, or even disappear entirely. This typically occurs when too much pressure is applied or blending continues for too long. The result is a flat, uninspired look where all the depth disappears.
Conversely, under-blending leaves harsh lines and obvious transitions between colors, making the eyeshadow appear unrefined and unfinished. This is a common indicator that not enough time was dedicated to diffusing the edges. The key is to find the sweet spot: blend just enough so that colors melt into one another seamlessly, creating a gradient without losing their individual identity.
- Use light pressure and small, controlled movements.
- Stop blending when edges are soft but colors are still distinguishable.
- Reapply small amounts of pigment if colors become too diffused by over-blending.
To avoid over-blending, remember that a little pressure goes a long way. For under-blending, dedicate an extra minute or two to buffing out those edges with a clean brush. It might feel tedious at first, but the polished result is worth the effort.
Using the Wrong Brushes or Too Much Product
The wrong tools can make blending an uphill battle. Using a brush that is too stiff or too large for the area you’re working on can create unwanted harsh lines or a patchy application. Similarly, applying too much product at once makes it incredibly difficult to blend out evenly, often leading to uneven patches or excessive fallout.
Always start with a small amount of eyeshadow on your brush, tapping off any excess before touching it to your eyelid. It’s always easier to build up color incrementally than to remove excess. For brushes, ensure you’re using a soft, fluffy blending brush for diffusing, and a denser brush for packing on color. Having a variety of brushes for different purposes is crucial.
Another common error is neglecting to clean brushes regularly. Dirty brushes can transfer previous colors, making new applications muddy, while oil and residue build-up can make blending difficult. Regular cleaning ensures optimal performance and hygiene.
By being mindful of these common mistakes—finding the right balance of blending, using appropriate tools, and managing product application—beginners can significantly improve their eyeshadow blending technique. These adjustments will not only make the process easier but also ensure consistently beautiful and professional-looking results.
| Key Blending Tip | Brief Description |
|---|---|
| 🎨 Use Right Brushes | Employ fluffy brushes for blending and flat ones for packing color. |
| ✨ Prime Your Lids | Always apply an eyeshadow primer for smooth application and longevity. |
| 🔄 Build Layers Gradually | Apply small amounts of shadow and blend before adding more. |
| 🧹 Clean Your Brushes | Regularly clean brushes to avoid product buildup and messy blends. |
Frequently Asked Questions About Eyeshadow Blending
For beginners, the most essential brushes are a fluffy blending brush, ideal for diffusing harsh lines and creating seamless transitions, and a flat shader brush for packing color onto the eyelid. A small pencil brush is also beneficial for precise application in the crease or along the lash line. These three will cover most basic blending needs effectively.
To prevent eyeshadow creasing, always start with an eyeshadow primer. Primer creates a smooth, even base and provides a tacky surface for the shadow to adhere to, combating the natural oils on your eyelids. Applying a thin layer of a matte base shadow over the primer can further help set your canvas and prolong wear.
Beginners should start with neutral eyeshadow palettes that include a range of light, medium, and dark matte browns, taupes, and possibly a shimmery highlight shade. Neutral colors are forgiving and versatile, making it easier to practice blending techniques without the complexity of color theory. As you gain confidence, you can incorporate more adventurous hues.
Muddy eyeshadow often results from applying too much product at once or not cleaning your brushes regularly. Try applying smaller amounts of eyeshadow and building up the color gradually. Also, use a clean blending brush for the final buffing, as old product on brushes can mix colors unintentionally, leading to a murky appearance.
You’ve finished blending when there are no harsh lines visible between the different eyeshadow shades; colors should seamlessly transition from one to another, creating a smooth gradient. Step back from the mirror and observe your eyes from various angles and in different lighting conditions to ensure the blend looks cohesive and polished.
Conclusion
Mastering the art of eyeshadow blending may seem daunting at first, but with patience, the right tools, and consistent practice, it transforms from a challenge into a truly enjoyable and rewarding aspect of your makeup routine. By meticulously following the steps outlined—from understanding your products to perfecting your transitions—you unlock the potential for creating stunning, professional-looking eye makeup that enhances your natural beauty and confidence.


